Well I love my tools, and I often get questions from students about different tools, so I thought i could share some here.
The next key jewellery making tool I'd like to feature is my pusher, or pushers....
The next key jewellery making tool I'd like to feature is my pusher, or pushers....
Pushers are a key tool for anyone who wants to set stones into metal, and I do love my stones.... I am not a traditional fine jeweller, or a setting specialist, and I don't typically use small sparkly stones in many of my designs, but I do love my big, colourful or patterned stones, and the stones I do use, I always set myself.
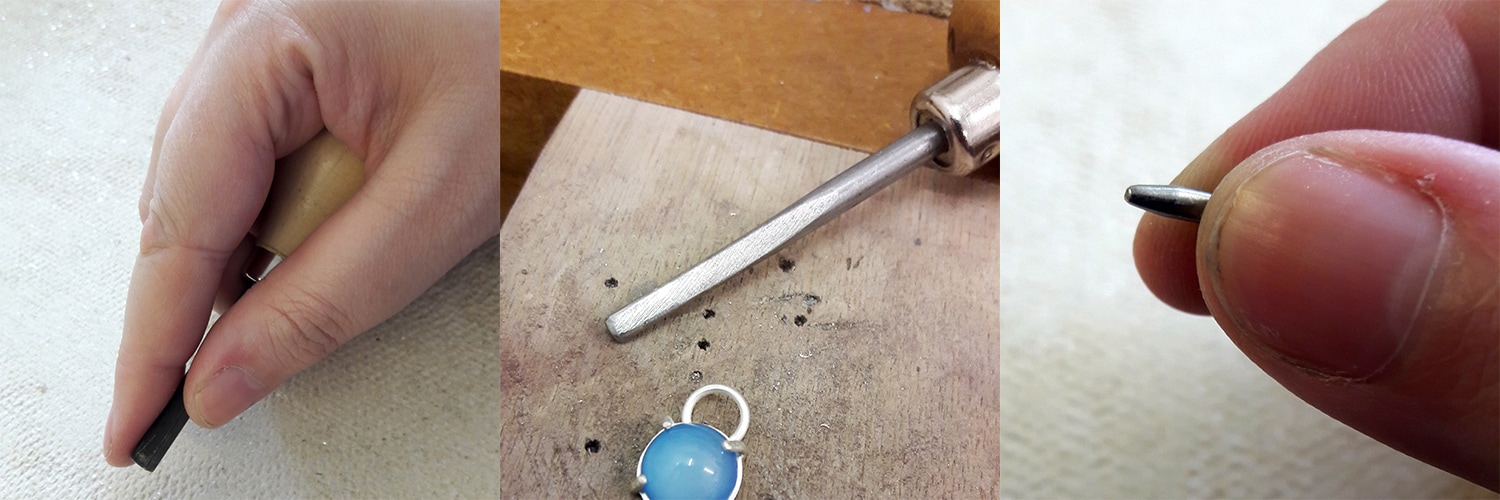
I use my pusher to ease the claw, tab or bezel wall edges I've created in around my stone so that they fold in and downwards, to hold the stone in place in my design. I also use a pusher when I flush set small stones to compact the metal around the stone and hold it in place.
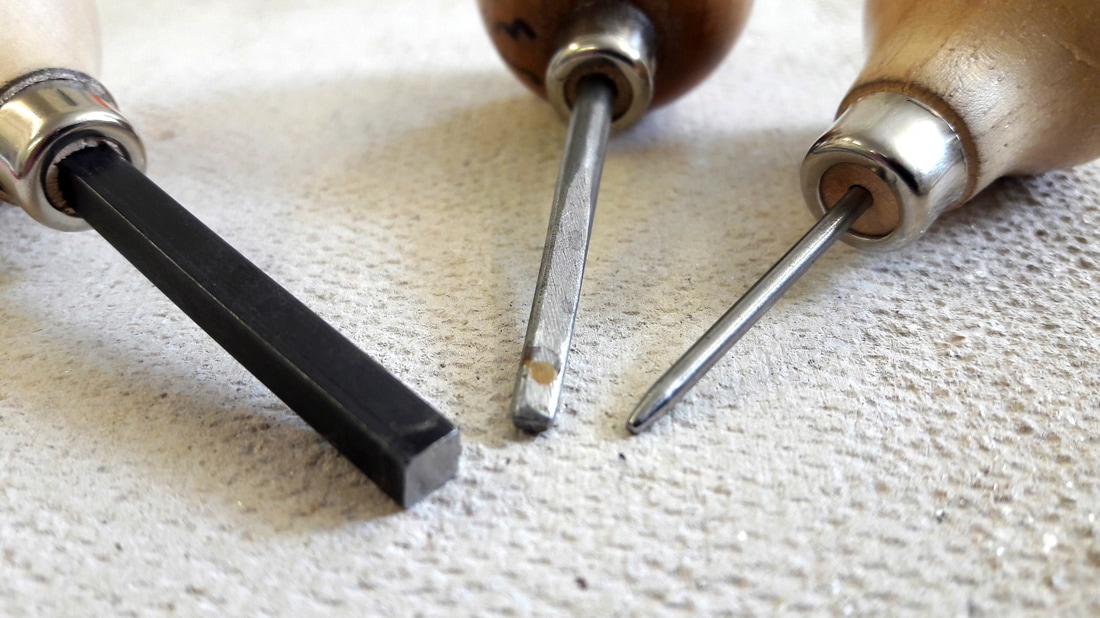
Pushers come in various shapes - you can use them direct, as they arrive from the tool supplier, you can grind, polish, sand and adapt bought ones to suit you, and you can make your own from steel nails, drills or other disused tools.
Pushers are effectively just small lengths of steel with a smoothed end. You can make your own by using a file, sandpaper, an abrasive tool or electric sander of some type to adapt the tool tip. The first job, whether you are starting with a bought tool, or an adhoc old used burr, nail or drill, is to take off any sharp edges and corners. Depending on the type of setting you want to use the tool for, you may need different shaped heads - for bezel walls and tabs, you want a larger flat head, for flush setting small stones, a much more delicate point is needed, for claw settings, you may prefer a channel in the centre of your pusher to fit your claws.
Once you have created the pusher shape, you will need to use emery paper (working from coarse to fine, as always) to remove any marks and scratches. Use an abrasive polish to remove any last marks and give the tip a good shine. The better finish on your pusher, as with your hammers, the less un-necessary marks you will make on (and then need to remove from) your piece of work, so it is well worth keeping your tools smooth and polished!
If you want to prevent your pusher from slipping and marking your stone however, you may choose not to polish it - leaving it with a matt sanded head will allow it to grip the metal better.
Bought pushers come ready fitted into a wooden handle, but if you are making your own, you can hammer your steel into a bought handle, or one made yourself from a cork or wood scrap that fits your hand appropriately. Having a comfortable handle and having a tool length that fits your hand, makes a huge difference making it comfortable to work slowly and gradually, with the pressure needed to move your metal without ending up hurting your hand. If needed, of course, you can sand, file or polish your wooden handle too, as well as adapting the steel part to fit your hand and needs.
Every jewellery has their own favourite tools - what are your favourites? Do share your faves below, or images of any tools you've adapted to suit your work!
Every jewellery has their own favourite tools - what are your favourites? Do share your faves below, or images of any tools you've adapted to suit your work!


 RSS Feed