Penny Akester Jewellery
  • Home
  • Jewellery
    • Jewellery For Sale
    • Jewellery Portfolio >
      • Simply Silver Collection 2022
  • Jewellery Tuition
    • Upcoming Jewellery Classes
    • Private Jewellery Tuition
    • Online Jewellery Tuition
    • Jewellery Tuition FAQ
    • Student Gallery
    • Jewellery Making Kits
    • Resources for Makers >
      • Bead Jewellery Resources
      • Stitched Beadwork Resources
      • Wax Carving Resources
      • Kumihimo Resources
      • Mixed Media Jewellery Projects
  • About Me
  • Contact
  • Blog

Tool Time - Files

16/6/2020

0 Comments

 
Files are one of the most common tools used in a jewellers workshop - they are used to remove excess metal - to smooth, shape and refine metal surfaces, to clean or reshape edges and to cut shapes into the metal.
Files can of course be used on other materials too - wood, acrylic and wax being the most likely for a jeweller.
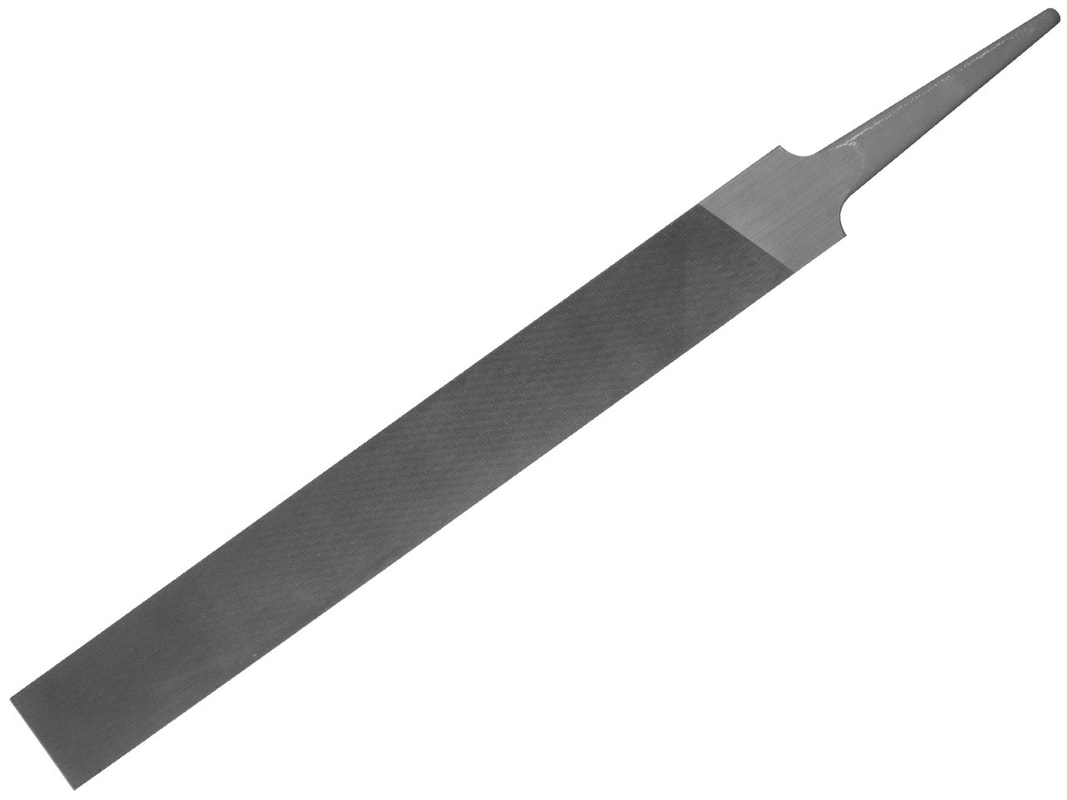
A file has a long handle, and then a specific shaped section that has fine, sharp, cutting teeth cut into it. 

Standard hand files come most commonly in a flat (rectangular cross section) shape, a half round (D shape cross section, tapering to the tip), and a tapered round shape. Needle files are mini files - usually around 15-20cm long including their handles and these come commonly in a much wider range of cross sections - to reach into small spaces and create specific profiles or edges on your metal.

My top 5 file tips...

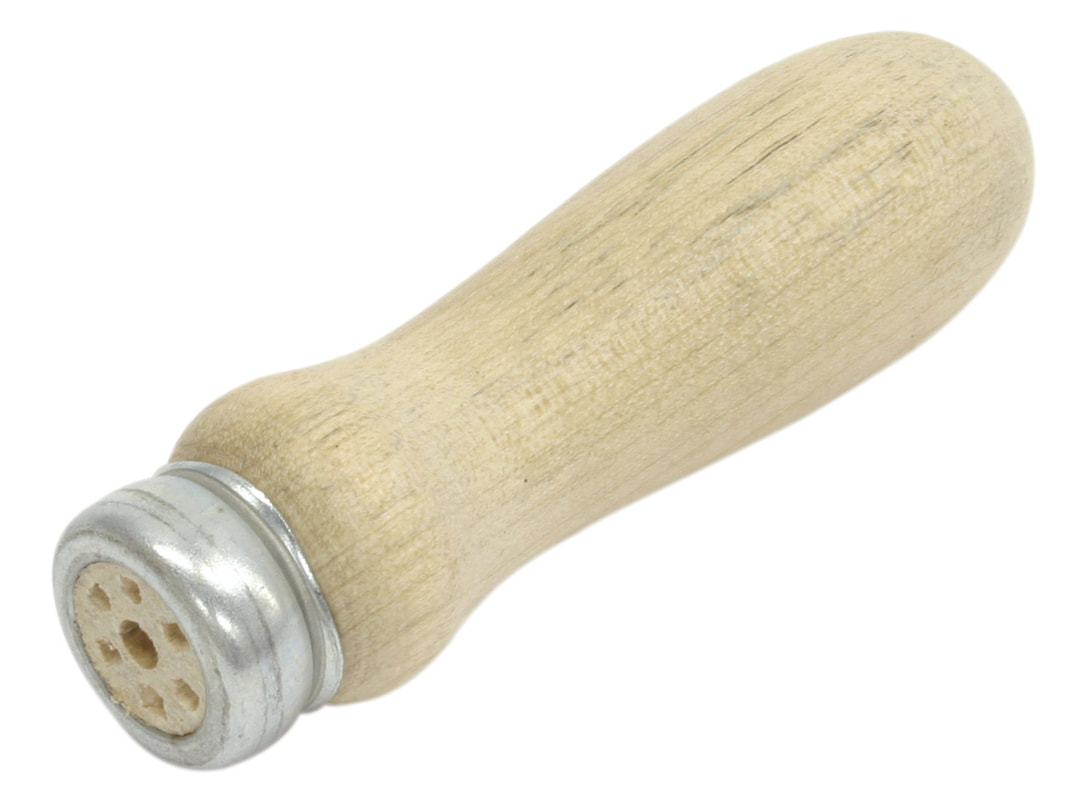
1. - Files don't come with handles fitted - this is so that you can choose one that fits best to your hand. Make sure to fit a handle to your hand files before using them - the more comfortably and better you can grip the files, the more efficiently you'll be able to use them
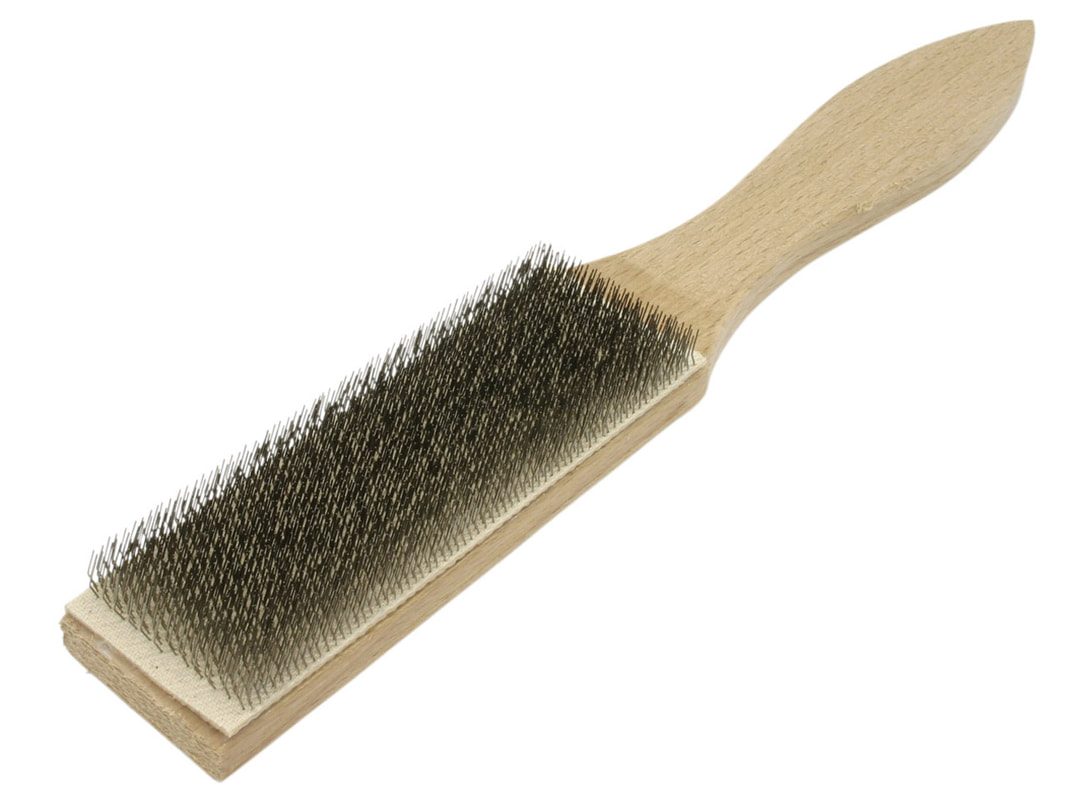
2. - Keep your files clean - use a file brush to remove any filing dust from between the teeth. Use talcum of french chalk on your file before use to help prevent the teeth becoming clogged.
3. - File away from you - start at the top of the file and push away from you, using the full length of the file where possible, for the most effective filing - and make sure your work is supported 
4. - If you're starting to collect a tool kit - the most useful files to start with are usually a #2 cut half round file, and a small set of needle files.
5. - To work with wax, wood, or acrylic (perspex) - use a coarse file - a #0 or #00 as these won't clog up as quickly and will be more effective

For more info on files and filing - keep an eye on the Jewellery Club where I'll be loading full notes on this topic in the silver jewellery section later this month...

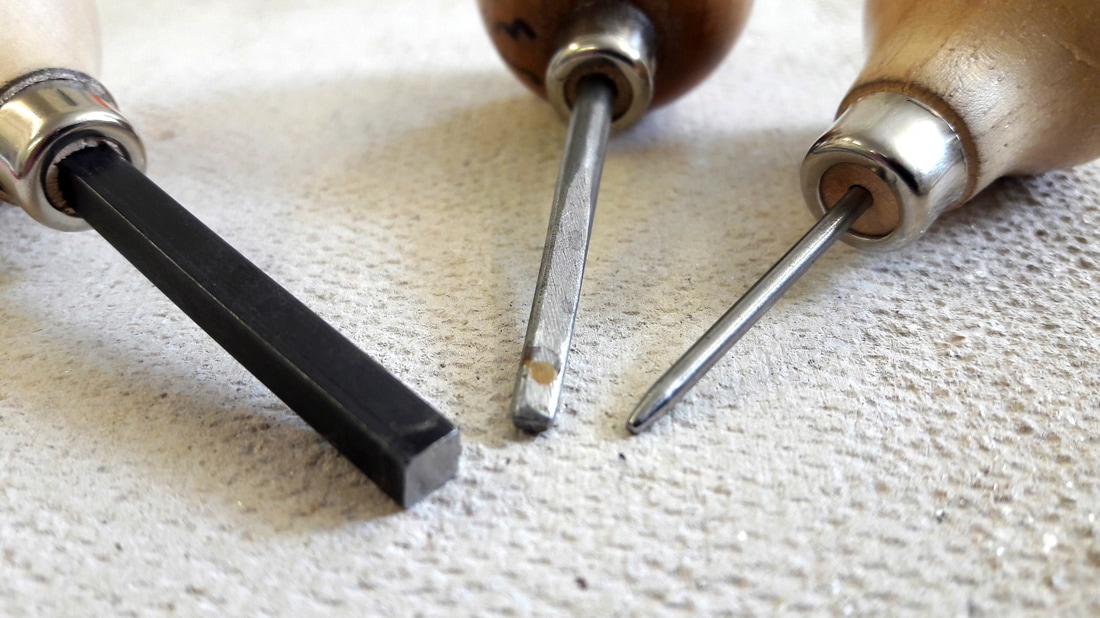
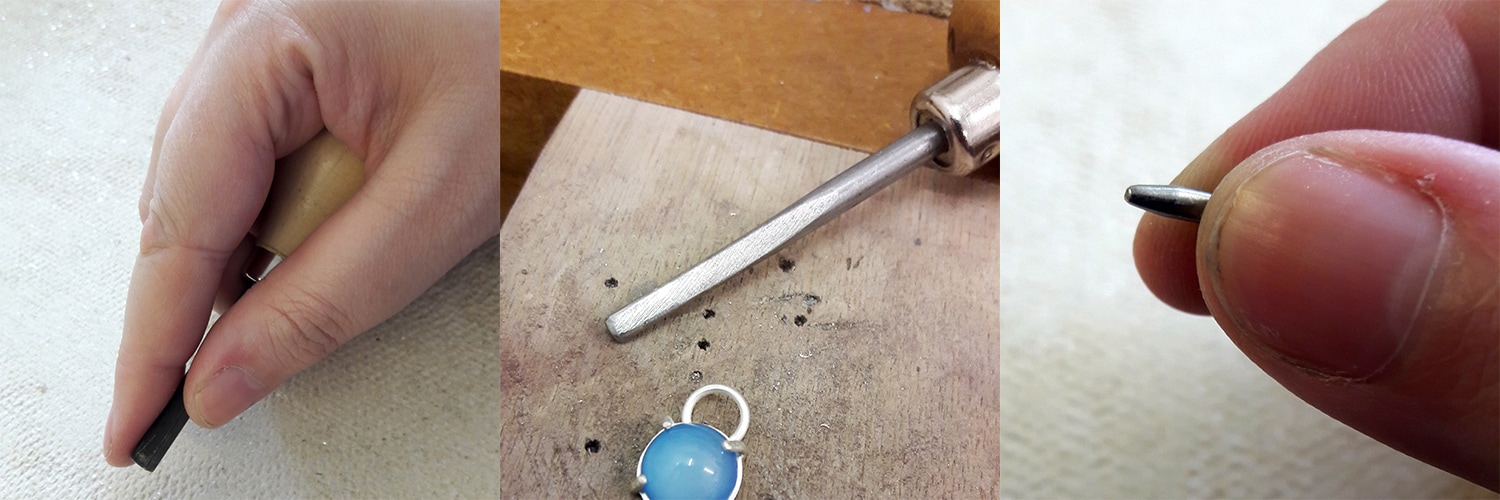
​Images below show a flat hand file, a standard wooden file handle, and a file brush
Picture
Picture
Picture
0 Comments

Jewellery Making Kits

1/5/2020

0 Comments

 
For the most part, I keep occasional tool kits around to have available for my students if they choose to buy one so that they can get started working at home as soon as they've finished a class with me, but as there are no 'in person' classes at the moment, only online ones, I thought i'd offer the kits i currently have here online....

I have 2 different beginners introduction to Kumihimo (Japanese braiding) kits - making a fun bracelet - with, or without beads (if you're new to braiding, it's easier to start without beads)...
Kumihimo is a great activity to do anywhere - and this starter braid is fun and easy to learn at home for anyone 8-88!

I also have in stock; -
  • Beginners beadwork kits - everything you need to get started with stitched beadwork / beadweaving is included, with or without some beads to get you started. Including links to some beginner spatterns...
  • Solid acrylic rollers for metal clay (or polymer clay) - solid acrylic, with decorative bubbles enclosed within it
  • Sets of Pin Vice, plus drills and burrs  - great for working with silver clay or wax carving
  • Silver clay starter sets - including all the tools you  might need to get started working with silver cfay

To view the kits and see more information - click here, and scroll down to the bottom - https://www.pennyakester.co.uk/store/c1/JewelleryTuitionLondon
Picture
Picture
Picture
Picture
0 Comments

Tool Time - Files

13/3/2020

0 Comments

 
Files are one of the most useful and universal tools in jewellery making. They come in a wide variety of shapes and styles, but every jeweller is likely to find at least one amongst their kit, and if they do metalwork, then probably a whole handful of different ones!

Files are steel tools that have teeth cut into them, the file is used to remove areas of metal (or also for use with other materials - wax, wood, acrylic and more...) to refine or change a shape or surface.

We use files to smooth edges, to remove marks or blemishes from surfaces, and to change the shape or profile of pieces and it is therefore important to use the right file for the job...

My top 5 tips for files....

1. - the best files to start with for general silver jewellery making are a #2 cut half round file (you then have a flat, a curved and a corner surfaces to use), and a small set of needle files (needle files are mini files that come in a wide range of shapes and profiles and are great for fitting into different nooks and crannies).
2. - Files don't come with handles fitted - this is so you can choose and fit a handle that suits your hands best. Make sure to fit a handle to your full size files at least, as the better you can hold the file, the easier and more effective it will be to use efficiently
3. - a #0 or #00 file is a rough file useful for working with wood, acrylic and wax as being rougher it will not get clogged up with filings as quickly 
4. - if a regular hand file will fit and has the right shape surface, don't use a needle file - the larger file is much more efficient. Do change down to finer grades as soon as you have the main shape created, as
5. - choose the grade of the file you use (both hand files and needle files come in different grades) to suit what you need to do - if you just need to remove a small imperfection or surface mark, use a finer (#2 or #4) file - if you need to remove a lot of material - use a coarser #0 file, or use a saw to cut more off and then go back to filing

Images below - a flat hand file, a regular wooden file handle, a file brush (for cleaning out the teeth if it gets blocked)
Picture
Picture
Picture
0 Comments

My Favourite Tools - Pusher

20/4/2017

 
Well I love my tools, and I often get questions from students about different tools, so I thought i could share some here.

The next key jewellery making tool I'd like to feature is my pusher, or pushers....
Picture
Pushers are a key tool for anyone who wants to set stones into metal, and I do love my stones.... I am not a traditional fine jeweller, or a setting specialist, and I don't typically use small sparkly stones in many of my designs, but I do love my big, colourful or patterned stones, and the stones I do use, I always set myself.

I use my pusher to ease the claw, tab or bezel wall edges I've created in around my stone so that they fold in and downwards, to hold the stone in place in my design. I also use a pusher when I flush set small stones to compact the metal around the stone and hold it in place.

Pushers come in various shapes - you can use them direct, as they arrive from the tool supplier, you can grind, polish, sand and adapt bought ones to suit you, and you can make your own from steel nails, drills or other disused tools.

Pushers are effectively just small lengths of steel with a smoothed end. You can make your own by using a file, sandpaper, an abrasive tool or electric sander of some type to adapt the tool tip. The first job, whether you are starting with a bought tool, or an adhoc old used burr, nail or drill, is to take off any sharp edges and corners. Depending on the type of setting you want to use the tool for, you may need different shaped heads - for bezel walls and tabs, you want a larger flat head, for flush setting small stones, a much more delicate point is needed, for claw settings, you may prefer a channel in the centre of your pusher to fit your claws.
Once you have created the pusher shape, you will need to use emery paper (working from coarse to fine, as always) to remove any marks and scratches. Use an abrasive polish to remove any last marks and give the tip a good shine. The better finish on your pusher, as with your hammers, the less un-necessary marks you will make on (and then need to remove from) your piece of work, so it is well worth keeping your tools smooth and polished!
If you want to prevent your pusher from slipping and marking your stone however, you may choose not to polish it - leaving it with a matt sanded head will allow it to grip the metal better.
Picture
Bought pushers come ready fitted into a wooden handle, but if you are making your own, you can hammer your steel into a bought handle, or one made yourself from a cork or wood scrap that fits your hand appropriately. Having a comfortable handle and having a tool length that fits your hand, makes a huge difference making it comfortable to work slowly and gradually, with the pressure needed to move your metal without ending up hurting your hand. If needed, of course, you can sand, file or polish your wooden handle too, as well as adapting the steel part to fit your hand and needs.

Every jewellery has their own favourite tools - what are your favourites? Do share your faves below, or images of any tools you've adapted to suit your work!

My Favourite Tools... Baby Wipes

23/3/2017

0 Comments

 
Well I love my tools, and I often get questions from students about different tools, so I thought i could share some here.

The next key jewellery making tool I'd like to feature is the humble baby wipe. Not exactly a traditional jewellers tool, but for me this is another key one!
Picture
A Baby Wipe - How does it help?
Well I realise these are not automatically thought of as jewellers tool, but this is something I am never without when working!

I do primarily use this when working with metal clay, but they come in handy at all sorts of times. Mostly for cleaning up, but cleaning up can be key in an active and busy working space!

Baby wipes when used with metal clay are a great help - being both moist and a fine woven cloth. Used on wet or dry clay, they can be used to smooth and refine edges, as well as to soften forms and even get rid of fine surface cracks and marks.

By gently massaging or stroking the clay surface with the baby wipe, the clay is moistened and can be gradually moved by further stroking - either continuing with the baby wipe, or alternative baby wipe and a damp finger. I love this way of working as it allows a lot of working directly with the hands and fingertips on the clay, to do the same job that filing or sanding would do on sheet metal.

Baby wipes are great for cleaning up - if you've been using messy equipment - polishing, or using paints, chemicals, solvents - they don't disintegrate as quickly as tissues and they are great for wiping down surfaces!

Use them as they are for minor cleaning, or add acetone (or other chemicals relevant to your spills) to clean more severe problems such as cleaning up glues, resin spills, etching resists and conductive paint for electroforming.

The images below show some dry metal clay elements both before and then after working with baby wipes.

Finally no - it doesn't seem to matter about the brand of wipe! For metal clay work, some leave more hairy fibres behind than others, but they all do the same great job. If you use enough wipes - collect them up in a bin bag and send them in with your metal reclaim - the clay wiped into them is all silver, and doesn't need to be thrown away - the wipes can be incinerated and the metal collected up!
Have you got any other key (jewellery related) uses for your baby wipes that you'd like to share?!
0 Comments
<<Previous

    Penny Akester

    I am a jeweller and jewellery making teacher based in London UK - see more about me and my work by browsing around the rest of this site.

    Archives

    May 2022
    November 2021
    October 2021
    June 2020
    May 2020
    April 2020
    March 2020
    January 2020
    December 2019
    November 2019
    April 2017
    March 2017
    February 2017
    January 2017

    Categories

    All
    About Me
    Contemporary Design
    Craft Fairs
    Crafts In London
    Digital Resources & Videos
    Getting Started
    Inspiration
    Jewellery Making Courses
    Jewellery Tools
    Learning
    Pattern A Day
    Sale & Special Offers
    Silver Clay
    Video

    RSS Feed

Home

Jewellery

 Jewellery Tuition

Contact

Penny Akester Jewellery - Camden Town, London NW1 - UK
​Copyright Penny Akester © 2009-25